

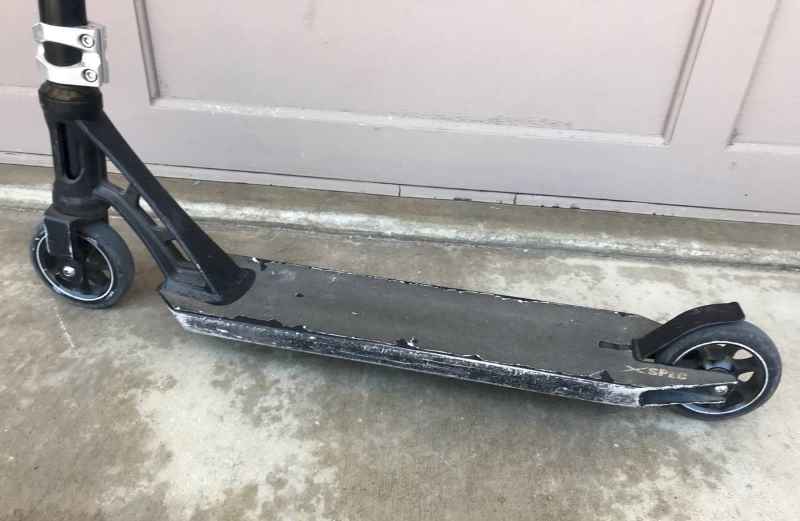
Do you have an old scooter that could use an uplift in looks? Or have you acquired a scooter that you wish was a different color? You might be wondering if you could spray paint a scooter to give it a new look.
Yes, you can spray paint a scooter. There are several steps in the process to ensure a successful outcome. The basic steps include preparation, prime, paint, and cure. I will give you details on how to spray paint a scooter to get the best results.
In this post, I will give you in great detail the steps needed to have a successful outcome, when it comes to spray painting your scooter. Plus some tips and creative techniques. Let’s get started.
Supplies For Spray Painting A Scooter: Beginner Friendly
Having everything you need from the get-go will make the process go much smoother and save time. If you are just starting out, you may not have anything. I list enough supplies to give you success on your first project.
Safety Supplies
Safety first! Spray paint has a list of undesirable chemical side effects. So to help reduce the irritants that come with spray paint, it is suggested that you take these precautions.
- Plan on painting in a very well ventilated space, preferable outdoors.
- A respirator mask will ensure that you won’t breathe in so many paint fumes.
- Eye protection such as safety glasses would be recommended.
- Rubber gloves to keep paint from getting on your hands.
Spray Paint Prepping Supplies
When preparing your kick scooter for spray paint a few steps need to be done. One of the first is to clean and prepare the surface to be painted. Stripping old paint off, cleaning, and smoothing before applying new paint needs to be done to get the best look and lasting paint job.
| Sandpaper-Medium & Fine Grit Baking Soda as a Paint Remover Green Scrubber Paint Thinner Clean Rags | Detailed Electric Sander/Block Hand Sander Paint Remover Coarse Steel Wool Masking Tape Paint Scraper |
Spray Painting Supplies
The things listed above are the supplies you will need to get you started when it comes to painting a metal kick scooter, whether it is aluminum, titanium, or steel. The finished project will be a success and make you proud.
Where To Spray Paint?
Before you begin the painting process, gather all your supplies, pick the location you will be painting the pieces, and prep the work area if needed by laying down old newspapers or a drop cloth to protect surfaces you do not want paint on. Spray paint will have an overspray so it is important to cover areas around the piece being sprayed to avoid unwanted paint on other surfaces.
The best place to spray paint is outside. It is the safest way to avoid inhaling the dangerous fumes that spray paint and other areoles expel. But if you are unable to do this, then setting up a spray box indoors helps protect other surfaces from getting paint on them. But you still need ventilation.
Old cardboard boxes make great spray boxes. Make sure it is large enough for your scooter parts to fit. Rigging up a system to hang the parts will give you the ability to paint all sides of your pieces without touching them. You can use old wire coat hangers that you would get from a dry cleaner’s store. If unable to acquire metal coat hangers, then some 13 gauge wire will do the trick.
How to make a cardboard box spray painting booth.
- Take a larger cardboard box and cut the top flaps off.
- Lay the box on its side with the top opening facing you.
- Cut a square hole in one of the sides of the box leaving at least a 3″ frame around it to keep the sturdiness of the box.
- Next to the box with the cut-out, you can place a box fan with a filter attached. This will pull the fumes away as you paint in the cardboard spray paint booth.
Here is a box fan filter setup. But what works just as well, is turning the box fan on, placing the filter on the side that pulls the air into the fan and the filter will stay on by itself while the fan is running.
- Now place this set up next to the hole you cut out in the box, blowing away from the box, and there you have it. The fan will pull the fumes away from you as you paint. Make sure to also have an open window or door to help with the ventilation.
Having proper ventilation indoors is important when you are spray painting or spraying any other aerosol chemicals because the sprays have toxic fumes that you don’t want to breathe in.
Preparing A Scooter For Spray Painting
Will spray paint stick to the metal without removing the old paint?
It can but, to do the job right you need to prepare the scooter so the spray paint will stick to the metal well and evenly. If the metal is properly prepared, spray paint will stick to the metal for a long time.
Here are the basic steps to prepare a metal scooter for spray painting.
- Remove paint
- Remove rust if any
- Sand and smooth
- Clean thoroughly
- Prime
The best way to cover the whole scooter with paint is to disassemble it. Take every piece you can apart and treat each piece as an individual part to paint. See my post about tool-sets, to help you decide which tools will work best for taking a scooter apart. Taking the scooter apart enables you to get all the cracks and crevasses when painting. This will ensure more even coverage on all parts.
Removing Paint
Removing the old paint on the scooter will probably require assistance from a chemical stripper. These products come in spray form and liquid that you can paint on with a brush. Here are a few ideas or products that can remove paint from metal.
A less toxic chemical to remove paint is a common household product. This is found in just about every kitchen and it is very inexpensive. The product is baking soda.
Your thoughts about now, might be, “baking soda?” How the heck can a common inexpensive household kitchen product remove paint? Well, I have to tell you I couldn’t believe it either, but I stumbled upon it while doing my research and found house restorers using this method to remove paint off of small metal pieces, and it removes the paint quite nicely and is not toxic.
Check out this video to see how it works. Prepare to be amazed.
So my thoughts are, if baking soda can remove paint from metal hinges and such, it could do wonders on small metal parts of a scooter. If you could find a metal pot big enough to submerge the scooter deck, you could use this method on your deck too. Amazing! It would sure save tons of sanding and scrapping and save a good chunk of change. Baking soda is cheap!!
If you are unable to submerge your piece, (say your deck) in boiling baking soda water to remove the paint, there are sprays and gel paint removers that claim to be less toxic that can do the job.
Heated vinegar poured over the scooter deck and left to sit could be a good inexpensive low toxic paint remover option also. But it would have to be poured in a metal or heat-resistant container. You might have to repeat this process a few times to completely remove the paint. It is another inexpensive less toxic solution.
In addition to the non-toxic common household products, there are commercial products that claim to be less toxic than traditional chemicals used to strip paints. These strippers might work out better over the other products I have mentioned for your particular needs.
Again safety first, always remove paint in a well-ventilated area and read all manufacturer’s instructions before using the product of your choosing.
Remove Rust
If you have a steel scooter and it has developed rust you will need to remove the rust before painting. There is a simple way I have found that can remove rust easily.
It is also an inexpensive household item found in almost every kitchen, and that is vinegar. This is the least toxic and physical way to remove rust from metal and the least expensive.
I found this great time-lapse video showing vinegar removing rust. It is more exciting than watching paint dry.
If there is some stubborn rust that needs a little extra help getting off, then sanding can help get it off the rest of the way or a wire brush.
Sand And Smooth
Now that all of the paint has been removed, and all rust, you want to make sure the surface is smooth and clean of any leftover residues.
Fine sandpaper and some water can smooth the metal out nicely if you were not able to get off all of the paint with the chemical paint remover products. Sanding it off is an option, but it takes a lot more work and elbow grease.
Sanding to remove the paint completely.
Hand sand the scooter parts and for larger areas, if you don’t have an electric detail sander, a block sander can be used to get more even tension over large surfaces, such as the scooter deck.
Using an electric detail sander will save time and energy if you have one.
The last step would be to wet sand with fine-grit sandpaper to smooth the bare metal. Now you are just about ready to start the fun part, painting.
Cleaning Thoroughly
After wet sanding the scooter to get all debris and excess paint off, it is important to thoroughly clean all surfaces with a cleaning agent, that will remove all grease and grime and any loose particles left by the paint removal process and sanding.
Ordinary dish detergent that is a degreaser will clean the metal and get it ready for the primer. It is important to then wipe down with alcohol or mineral spirits/paint thinners to remove any oiliness from the detergent. Clean each piece thoroughly with warm water, detergent, alcohol/mineral spirits, and a clean rag.
Make sure the pieces are completely dry before going onto the next step.
Applying The Primer
The first step after removing all the unwanted old paint is to prime the metal. TIP: While you read this, place your can of primer in warm water so it can heat up the paint inside. This will thin out the paint some and make it spray-on thinner.
You might wonder if you need a primer to spray paint metal? It is best to use a primer to enhance the color and also help the paint to adhere better. It will give the spray paint something to hang onto and allow the paint job to last longer. Primer is an important step to getting the best outcome to spray painting your scooter.
It is best to prime your metal scooter after the paint has been removed and all residue is properly cleaned off. The best color for the primer would be white. White will show off your main color as its true color. If you are painting your scooter black then use a black primer. Darker colors such as black, dark brown, etc. will do better with a black or gray primer.
If you are painting a stunt scooter, you will want to place masking tape on the grind channels, before priming to leave them bare metal. This enables your scooter to glide better without the stickiness of paint scraping.
In the designated spot you have chosen to paint your scooter, set up your scooter to be painted by hanging it on the device you have come up with to hang the parts. Wire clothes hangers can work for this or a clothesline.
If you have neither at your disposal, some heavy-duty wire could work.
Begin spraying on the primer.
To ensure that the paint comes out of the can evenly and smoothly, remember to (TIP:) warm the can up in some very warm water before you start. It will help the paint to thin out a bit and glide more smoothly out of the nozzle which will give you a more even thinner coat.
Using a spray paint can handle can make it easier to get even coverage.
Begin…
- Shake can very well
- With long even strokes that go past the ends of the piece as you spray, begin painting.
- You want to put thin even coats on. Read the manufacturer’s instructions to get the full details.
- Let dry properly before going onto the next step. Again follow directions on the can.
After the primer is on and dried according to the instructions it is time to go onto the fun part, the actual painting of your scooter. You can paint your scooter normally or create unique one-of-a-kind designs with the techniques I describe below or if you are the creative type you can come up with your own unique designs.
Painting Designs-Creative Fun
When painting a scooter and other metals, enamel paint is best. Enamel paint is an oil base versus latex which is a water base. It is the most durable paint which resists moisture best and helps keep down rust on metals. So when choosing spray paint, choose enamel over latex for painting metal scooters.
Proper temperature and humidity play a role in getting the best outcome for your painting projects. Check out this TECHNICAL DATA sheet to get much-needed detail on how to spray paint using Rust-Oleum Acrylic Enamel 2X Coverage.
Normal Spray Painting
To paint your scooter with one color and no design, follow the steps above the same way that you sprayed on the primer. It will probably need a couple of coats and that will be finished off with a clear coat (described below) to seal the painted surface.
Before starting, make sure your environment is dust-free. Painting in a painting booth such as a cardboard booth will keep the dust down and off your project.
The first coat of your main paint color should go on thin, (this acts as a tack coat, which gives the rest of the paint something to adhere to). Wait an adequate amount of time for drying in between coats. When doing the second coat, spray it on in the other direction of the first coat, this helps the paint to get into cracks and tight areas, plus prevents a striping effect. Make long dense strokes as you paint your pieces a little thicker than the first coat. Stay back about a foot as you spray on the paint.
TIP: When finished painting, hold the can upside down and press the nozzle until the paint color stops. This will clear the nozzle of paint and help the paint come out more evenly when you go to use the spray paint again.

Hydro Dip Spray Painting
Hydro dip spray painting is a very fun unique way to paint a scooter. This technique involves a large container for water and then you spray different colors of spray paint on top of the water.
You then dip the piece slowly and at an angle into the water and the paint adheres to the metal in a similar look as it sits on the water. Completely submerge the piece and swirl it around under the water until the paint on the top of the water has moved out of the way. This way when you pull your piece out no other paint adheres to it. You will come out with a different look every time. No two pieces will be the same. Fun stuff!
Find a container large enough to fully submerge the pieces to be painted. A plastic kitchen garbage can or recycling bin would be large enough to dip a scooter deck in.
Important to wear gloves when doing this technique and the other techniques described.
Have all the pieces to be painted, prepped, and ready for this step, because you need to move quickly before the spray paint starts to dry on the surface of the water.
Also before doing your actual pieces, I suggested doing some testers with the paints you are using to make sure they cooperate with this technique. Also, you will get a bit of practice before moving on to your actual project. Begin by…
- Filling the container that you have chosen just about to the top with water.
- Using the same spray paints and brands to get the best results in multiply colors of your choosing, spray paint into the water, alternating colors. The paint will stay on top and make a pattern.
- Next, take the piece that is to be covered in paint at an angle and start submerging it into the water. Submerging at an angle reduces air pockets which causes paint to bubble and spread weird on your piece.
- Now that the piece is completely submerged under the water give it a swirl or two to spread the paint on the top surface. This will get the paint out of the way so when you bring the piece back out of the water no other paint will stick to it. That would change the design that you achieved with the first dip.
- Slowly bring the piece out of the water on an angle again and shake off the excess water, and WHALA! A very cool paint design on your scooter pieces. If you practice on the smaller pieces first by the time you get to the deck you will have a better feel for the technique.
- Let dry thoroughly and finish with a clear coat to seal. See clear coat instructions below.
Here is a video showing the technique of hydro-dipping using spray paint.
Spray Paint Designs With Tape

Another design technique is using tape to get the desired look. After applying primer and base paint, (make sure paint is all the way dry before putting tape on, this usually takes a day or two), tape off the pieces in a design of your choosing.
Cover areas that you want different colors with paper or tape so that your first spray paint color does not get on the rest of the scooter. Then cover the pieces you have painted so that you do not get the second color of paint on the first painted section and so on if you do multiple colors.
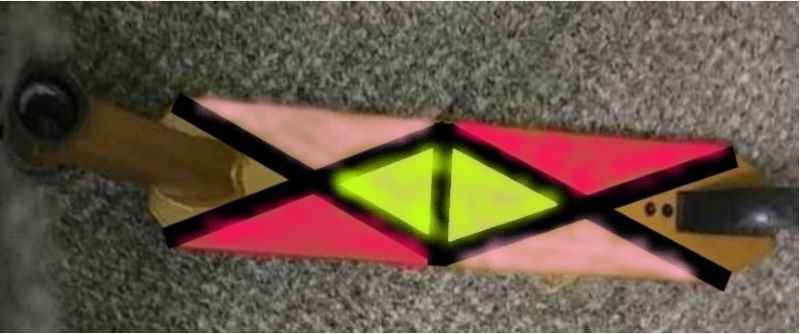
Then peel the tape off and reveal your unique design. Finish up with a clear coat as described below and enjoy your new-looking scooter.
Finishing Up The Painting Process
There is one more step that is crucial if you want your paint job to last longer and look better and that is applying a few coats of clear. A clear coat helps seal in the paint and helps to prevent wear and fade on your fancy paint job. It is just one more step to ensure a great outcome!
Here are the steps to take to apply the clear coats and get the best results.
When To Apply Clear Coat And How
A clear coat can and should be applied after the painted piece has dried for about an hour or more than two days. This is considering the temperature of the environment is between 50 and 90 degrees and the humidity is relatively low. Higher humidity and cooler temperatures require longer drying times.
Using the same setup as when you spray-painted the primer on your pieces, start by applying 2 or 3 light coats about a minute apart during each application. You don’t want to go too heavy with coats because they may drip and you don’t want to have to start over.
Let dry and repeat the process maybe one or two more times. If you get what is called the orange peel effect you can lightly sand in between coats using a wet sanding process. This will help smooth out the surface so the next coat of clear will be smoother and shinier.
Make sure to let dry toughly before reassembling. The paint will fully cure in about a week. Pat yourself on the back for a job well done and enjoy your refreshed scooter!