

You take your scooter and head out for some scooter fun. You grab the handlebars, start to ride and your hands instantly get stuck to your handlebar grips and your hands practically stick like they’re glued on, YIKES! Why? Why are my scooter grips sticky, you might be thinking?
Your scooter grips are sticky because rubber or synthetic rubber is sticky, to begin with, to allow your hands to hold onto your handlebars better. After time though, sweat, oils, and dirt build-up on your grips and cause them to feel very sticky. It may be time to clean or replace them.
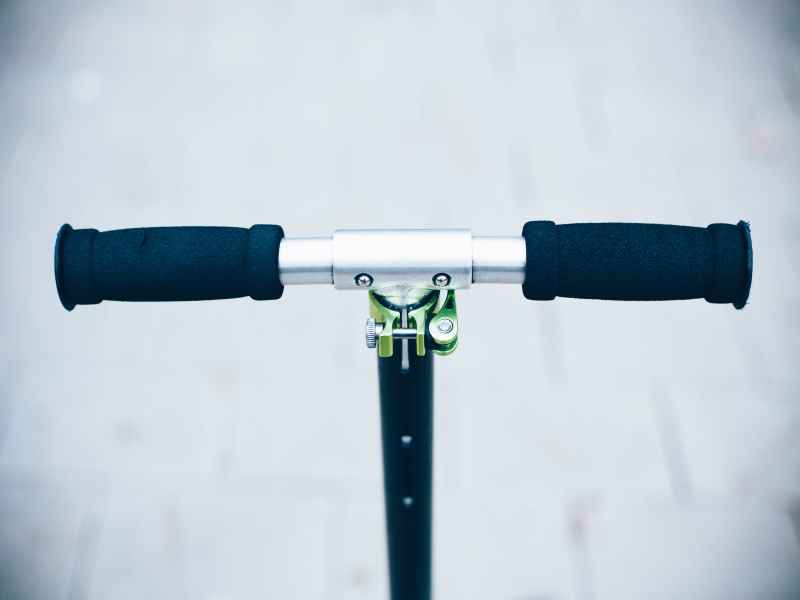
Scooter handlebar grips are a must on any scooter. Especially if you ride stunt scooters, you want them to be secure and feel comfortable. Having scooter handlebar grips that feel good and do not move will make your ride on any scooter safer.
Scooter grips need regular attention in order for them to perform well. The last thing you want is your grips to feel uncomfortable or even slip off as you ride because they are worn out and or torn.
If they lose their shape and they are feeling uncomfortable when riding it might be a good time to replace them. Start with maintenance, cleaning your grips regularly helps grips last longer and perform better.
How To Clean Sticky Handlebar Grips?
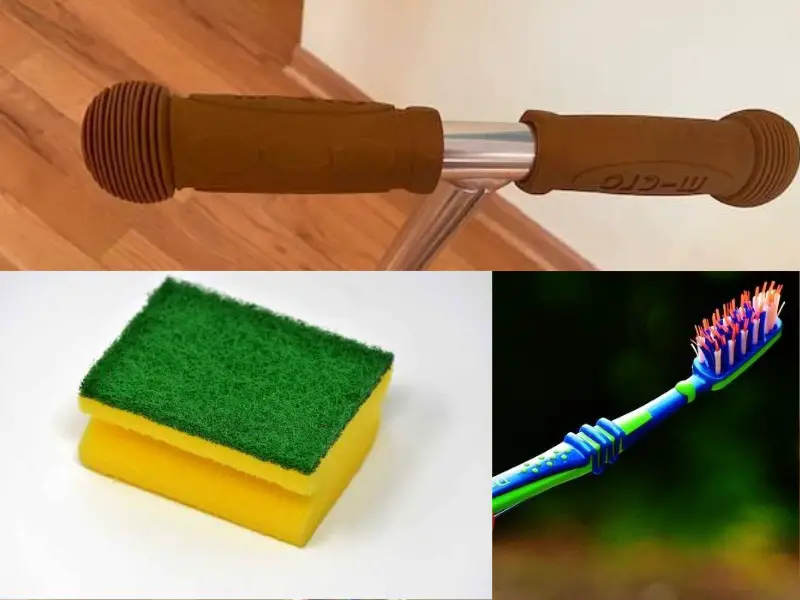
Here is a list of supplies and links to purchase them.
- Rags
- Spong Scrubber
- Scrub Brush
- Old Toothbrush or two
- Degreasing soap, like Dawn Dishsoap
If you clean your scooter handlebar grips often, say, after each ride it will remove dirt, debris, and oily residue off the grips. The grime that builds up on them may eat away at the plastic or rubber in your grips and cause them to wear out quicker. Plus, clean handlebar grips will make them less slippery each time you ride.
Cleaning Scooter Grips
This is the best way to clean your grips, which is very simple to do.
If you have the ability to remove your grips from your handlebars this makes it easier to clean them. See below how to remove handlebar grips. If you can get your grips off, just wash them in the sink like you would your hands. You may have to use a scrubber such as a sponge scrubber, or a toothbrush to get into the cracks and crevices.
If you are unable to remove the handlebar grips from the handlebars easily or you just do not want to go through the hassle, you can opt to clean them right on the handlebars.
Fill a container with hot soapy water, have a rag handy, a scrub brush a scrub sponge, or a toothbrush. The toothbrush can get tiny places better than anything else. (Do not reuse a toothbrush to brush your teeth with that you have used to clean scooter grips. Make sure you use an old toothbrush that you do not need anymore or a new one if you have extras. This message is going out to the youngsters).
Using the rag or sponge put it in the soapy hot water and wipe the grips down, if they need a bit more deep cleaning, scrub them with a scrub brush, scratchy sponge, or toothbrush. Repeat this process for stubborn dirt.
Do this in an area that is ok to get water on the floor or place towels under the scooter.
Now rinse off each of the handlebar grips with a hose or a spray bottle with water, or you could dip them in a small container of water. Warm water is preferred as it will help cut through the soap and make sure it is rinsed off completely. Hand dry and then let the grips air dry completely before riding again.
How Do I Make My Scooter Grips Not Sticky?
Stickiness on rubber or silicone handlebar grips can happen on occasion. The build-up is grease or oils that absorb into the rubber or silicone and leave a sticky residue on them. Try and keep your hands clean and it will help with the buildup of grime. But when this happens, it is a kind of gross and grimy feeling. So to fix this, here are some things you can try.
Supplies You Can Use
Steps To Take
- Start by cleaning with grease-cutting soap and hot water and a scrubber as described above.
- Then wipe down with a clean towel to dry.
- Next, using a clean towel or rag with rubbing alcohol (Isopropyl Alcohol). applied to it. Wipe the grips until they do not feel sticky anymore. Keep applying until the residue feels gone.
- If you don’t have Rubbing Alcohol (Isopropyl Alcohol), you also can use nail polish remover. But be careful not to get the nail polisher remover on painted surfaces because it could remove the paint.
If this does not work, make a baking soda and water solution the consistency of toothpaste. Rub the paste over the grips with a rag until it feels like the residue is gone, then rinse well with water.
If none of these options work, it is time to invest in new grips.
How Do I Change The Grips On My Scooter?
There are several steps in this process to change the grips on your scooter handlebars. Each step has a few different ways you can choose from to get to the desired goal. Below are ways, describe. The first step is to take out your bar ends.
How To Take Off Scooter Bar Ends?
The first thing you need to do before you change your handlebar grips on your scooter is to remove the bar ends. There are a few ways you can achieve this.
Plastic Bar Ends Removal
- Remove By Hand
- Before you do anything, see if the bar ends will come out just by pulling them with your hand. Sometimes if you are lucky, they will come out easily.
- Pull the handlebar grip back on the handlebar and pull on the bar end, twisting while you pull it, it should start to move and then come out. If this does not work try another suggestion.
- Before you do anything, see if the bar ends will come out just by pulling them with your hand. Sometimes if you are lucky, they will come out easily.
- Corkscrew
- If they are rubber or similar material and you just can’t pull them out, you could use a corkscrew to pull them out. This will still allow them to be reused if you are careful about how you use the corkscrew. Take your time and pull the bar end out slowly, trying to pull straight.
- Position the corkscrew in the center of the bar end
- Push corkscrew in as you twist
- When corkscrew is all the way in start pulling straight up
- Once the bar end comes out a bit, try helping it along with your hand, you can twist the bar end with your hand at this time
- If they are rubber or similar material and you just can’t pull them out, you could use a corkscrew to pull them out. This will still allow them to be reused if you are careful about how you use the corkscrew. Take your time and pull the bar end out slowly, trying to pull straight.
- Screw and Screwdriver
- If you are fresh out of corkscrews, you can also take a bigger size screw and screw it into the end of the bar end using a screwdriver and then pull on the screw with pliers or vice grips until it comes out. If you are wanting to try and preserve the bar ends, try pulling straight out instead of wriggling back and forth. If you can get it out a little bit, then try pulling it with your hand. If you are still struggling, try spraying Wd-40 or some other lubricant or solvent in between the bar end and handlebar to help break the seal that has developed over time.
- Drill and Standard Screwdriver (AKA Flathead)
- This is for bar ends that are harder plastic or composite. This way is a bit more destructive, but it is another option if all you have is a drill, a bit, and a standard screwdriver.
- You start by drilling into the bar end in the center, if your drill bit is small in size you may have to drill a few holes. You need an opening big enough to insert the screwdriver.
- Once you have inserted the screwdriver, start prying the bar end out by moving the screwdriver on an angle back and for as you pull. The bar end should come out with a few twisting pulls.
- This is for bar ends that are harder plastic or composite. This way is a bit more destructive, but it is another option if all you have is a drill, a bit, and a standard screwdriver.
- Vise Grips
- Roll the handlebar grip back away from the bar end. Clamp the vise grips onto the bar end, (use a rag around the bar end so you don’t scratch them up if you want to try and reuse them). Go straight on with the vise or with the vise grip up against the handlebar end (this is the best leverage this way). Then rotate the vise grips back and forth or twist while pulling the ends out. This should work, but you may need a little wd-40 or alcohol to help it break free.
Metal Bar Ends Removal
Metal bar ends are removed by using an Allen key or Allen wrench. They are usually much easier to remove than plastic ones that have been in the bars for a while.
- Find an Allen wrench the size of the screw in the center of the bar end. Then loosen the bolt in the center of the bar end, until bar end releases. Pretty simple. You may need to spray the bar end with some wd-40 if the screw is stuck.
8 Ways To Take Off Grips On A Scooter?
If your scooter grips are worn and torn and you really need a new set, you will need to take the old ones off first before installing the new grips. Taking off grips on a scooter can sometimes be quite easy but other times it can be a challenge.
- Cut Them Off
- If the handlebar grips are shot and too bad to save, the quickest way is to cut them off with a razor blade or scissors. If you are young I suggest you get an adult to do this or supervise, when using a razor blade.
- Using a sharp razor blade, slice the grips carefully not to score the metal bar.
- If the handlebar grips are shot and too bad to save, the quickest way is to cut them off with a razor blade or scissors. If you are young I suggest you get an adult to do this or supervise, when using a razor blade.
- Air Compressor
- An easy way to still preserve the handlebar grips would be to use an air compressor.
- Lift a part of the handlebar grip nearest the center of the bar and place the air compressor nozzle underneath the lifted-up area. Then blow air into the grip as you pull off. The grip should come off easily.
- Tire Pump
- If you do not have an air compressor you could try a bicycle tire pump. You might need someone else to pump the pump if you do not have an electric one.
- This would work in a similar way as the air compressor. Place the end of the nozzle underneath a lifted part of the grip and pump air into the void as you pull off the grip.
- Roll Off
- You can also try rolling them off, but this can be tough to do and may cause damage to your grips.
- Start at the center bar side and with the palm of your hand, push on the grip until it starts rolling onto itself. Keep doing this until it is off the bar.
- Then you have to unroll it when it is off the bar, this may cause damage to the grip.
- Rubbing Alcohol (Isopropyl Alcohol)
- Alcohol works well at removing grips and it evaporates quickly.
- Lay the scooter with the bar so when you put alcohol into the grip it can run down inside the grip.
- Lift grip up a little bit and spray or pour a little alcohol into it.
- Then start twisting the grip back and forth until it starts to move, twisting, and pulling as you do. The grip should slide right off.
- Cooking Spray
- The next way is using cooking spray. Lift grip a little, spray some cooking spray into the opening, and start moving the grip until it loosens. Twist and pull until it comes off.
- Spray Deodorant
- Follow steps 5-2,3,4.
- Wd-40
- Follow steps 5-2,3,4.
See the video below showing two methods for removing grips off your scooter handlebars.
How To Install Grips On Scooter Handlebars?
Once you have removed your bar ends and your handlebar grips to clean them or replace them with new ones, it is time to put them back on. Here are some things you can use to assist in putting the handlebar grips on.
Many pro shops and scooter repair shops use an air compressor to take off and put on handlebar grips. If you happen to have an air compressor at your disposal, that is one way you can put your grips on.
How To Put On Scooter Grips With An Air Compressor?
While an air compressor is not the only way to put scooter handlebar grips on, it is one of the easiest ways to do it.
What you would do when choosing to use an air compressor to put on your grips is….
- Make sure the handlebar has been cleaned off.
- Slide the grips on as much as you can by hand.
- Put the air compressor nozzle into the edge of the grip coming from the center of the handlebars and blow the air as you slide the grip on. It should go right on
The air compressor pushes air between the grip and the bar and causes a pocket of air in which the grip can easily slide right onto the handlebar.
7 Ways To Put On Scooter Grips Without An Air Compressor
There are several other ways I have seen how to put grips on your scooter handlebars. Here is a list of products you can use.
When using the spray on applications below, to make the fluid dry quicker, roll the handle grips back halfway once they are on the bars. Then wipe excess spray off. Roll back the other side and wipe the excess spray off then roll back. Repeat the process on the other grip. This cuts drying time down significantly.
- Rubbing Alcohol (Isopropyl Alcohol)
- Lightly spray the handlebar with alcohol and the inside of the grip, then slide it right on the handlebar. It should go on rather smoothly. Don’t use too much alcohol because it will take longer to dry. You should wait about 8 to 12 hours for the alcohol to completely dry, usually overnight is good.
- Hairspray
- Hairspray is applied in the same way as alcohol. Hairspray contains alcohol but it does add a bit of stickiness which helps handlebar grips to be more secure.
- Apply the hairspray the same as explained in step 1-1 and then you are good to go.
- Spray Deodorant, Wd-40
- It needs to be spray deodorant so you can spray it plus the alcohol is the key ingredient here. Wd-40 can be used also but I would not recommend it for putting grips on because of a residue that it can leave. If you are wondering about the cooking spray, I would only use that to remove grips because of an oily residue that cooking spray can leave
- To put the grips on, the process is the same as in steps 1-1.
- Spray Paint
- I would not really recommend this product because of the potential overspray, but if you are in a pinch and that is all you have available it is another way to put grips on handlebars easily.
- The process is the same as in steps 1-1. Just follow those and you are all set.
- Zip Ties
- You are going to need about 4 zip ties and you want them about an inch or longer than your grips.
- You start by feeding the zip ties into the grips. All going the same way. Have the lock mechanism on the end of the grip, not near the center bar.
- Space them out evenly inside the grips with the ties sticking out both ends of the handlebar grips.
- Now proceed to slide the grip onto the handlebar, spreading the zip ties so that they are somewhat evenly spaced. The ties should be between the bar and the grips.
- Slide the grip on and put it on just a little bit more, so it goes past the edge and is not even with the edge of the handlebar. The is so when you do the next step they will end up being perfectly on the edge.
- Now pull all the zip ties out by the locking edge with a pair of pliers or vise grips. As you pull the zip ties out one by one, they should pull the grip a little each time and this will cause the grip to now become flush with the end of the bar
- You are going to need about 4 zip ties and you want them about an inch or longer than your grips.
- Tire Pump
- A tire pump is a similar action as an air compressor, just that it is not as powerful or maybe as fast, but it is feasible.
- You may need another person to pump the pump as you hold the nozzle under the grip edge as you pull it on, or if you are using an electric tire pump you may be able to succeed on your own.
- Your Hands
- Put the grip on the handlebar as much as you can.
- Quickly close off the end of the grip with your hand trying to capture air to form an air bubble in the grip.
- Then with your hand flat, pound the end of the grip straight on quickly trying to keep a pocket of air in the grip. All the while pulling the grip with the other hand. This pocket of air will form a channel of air that will help the grip to slide on.
- It will take a bit of effort and it is not the easiest process but it will work.
How To Get Grips To Stick On Handlebars?
A product that I mentioned above is by using hairspray. Hairspray has a tackiness to it when dried and will help scooter handlebar grips to stay put.
See above on the process of how to use hairspray to get grips to stick.
How To Put Bar Ends On A Scooter?
Always use bar ends! Bar ends help keep your scooter bars from impaling you if you or someone else were to fall wrong on your bars. A bar end fills in the hole at the end of your handlebars which makes the bar end safer from falls on the end of your handlebars. That is why bar ends are important, especially for stunt and trick riders.
They also add aesthetics and protect the end of handlebar grips. They offer better handling when riding by keeping your grips from sliding off.
Aluminum bars will also wear out and mushroom if you do not ride with bar ends.
Plastic Bar Ends Installed
Roll back the handlebar grips and put the bar ends in the holes and push in as far as you can with your hand. Then use a hammer to pound the bar end in the rest of the way. Use a block of wood to rest the handlebars on as you pound on the other end.
If you don’t have a hammer and you have a solid concrete surface around, you could always give a bang on the ground to push the ends in. Use a rag to keep the ends for scratching.
If you are trying to put standard bar ends into an aluminum handlebar, they are sometimes too big, but there is a way to get them to fit. If you are young please have an adult assist you with the cutting.
- The first thing to do is, using a box cutter with a sharp razor blade, cut off the ribs on four sides. The plastic bar end has ribs that look like a giant screw, and some of these ribs need to be cut away.
- Place the bar end on the top side end, and slice away the ribs on four sides creating a square. At the end of the bar end cut away just a few of the ribs on the ribs that remain. This makes a pointier end to place into the handlebar.
- If this is not enough to get them to fit, you can then put slices into the bar end shank. Start with two slices that you can do with one cut using a big enough knife. If you’re using a razor, it will likely be two cuts.
- In the same position, the head of the bar end on a solid surface, slice into the shank, straight through to the head of the bar end. But don’t go too deep, only go about halfway down the shank. Do that to the opposite side now. Then see if they fit into the bar end. This will allow the bar ends to reduce in size to allow for a fit.
See the video below on how to put plastic bar ends into aluminum scooter handlebars.
Metal Bar Ends Installed
If you are replacing bar ends with the same bar ends, make sure they are cleaned well of dirt and any debris.
- Peel back the grip on the end of the handlebar and insert bar end, roll grip back.
- Tighten the bolt with the proper Allen wrench and you’re good to go! So simple compared to plastic.
Plastic Bar Ends Vs Metal Bar Ends
Plastic
Shop for plastic bar ends
- Lighter in weight than metal bar ends
- Comes in a bigger assortment of colors
- Can be cut to fit into different size bars. Slice the screw part with slits so it can squeeze together and fit in smaller bars.
- Easier on your hands when doing tricks.
Metal
Looking for metal bar ends
- Aesthetically pleasing
- Doesn’t break like plastic bar ends
- Adjustable to fit any scooter handlebars.
- Very easy to install and remove with a screw bolt.
- Gives extra weight to titanium bars for better spins
- Metal bar ends can take a lot more abuse than plastic
- If you are rough on your scooter, metal bar ends are a better choice
Alternative Handlebar Grips
There are other options you can consider when it comes to handlebar grips for your scooter. There are many, handlebar, paddle, and racket sports that use grip tape, and grip tape can be used for scooter handlebars too.
You can shop for scooter handlebar grip alternatives under these categories…
Grip tape could be a better option than handlebar grips. You might find you prefer it better than the standard grips for your scooter.
Now that you have everything you need to know how to maintain your handlebar grips, why not give your scooter a custom paint job. You can find out how to do that here.